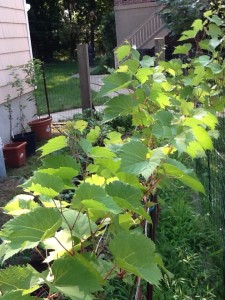
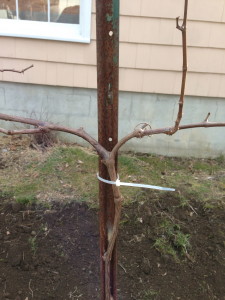
Growing grapes is a very rewarding process. Grapes can be grown in almost any climate, one just has to choose a variety of grape that is suitable for their USDA zone and have realistic expectations. I’ve made wine the past few years and have always purchased grapes from CA. While the grapes have been great and I could not want anything more I desired a deeper understanding of where and how the fruit was grown. So starts my adventure in growing grape vines.
Site selection: When growing grapes one needs a site that drains fairly well. The roots of grape plants do not like standing water or compact soil. It is best not to be at the top nor bottom of a hill to prevent wind and frost damage. I chose to grow my grapes in a raised bed at I knew the soil was deep, well drained, and heat would reflect off the garage wall late in the year to aid in ripening. One must till the soil so that the roots can easily reach down. I amended my soil with compost, sand and perlite to aid in drainage. Below are photos and narration of the process we chose based upon many hours of online research and select books.
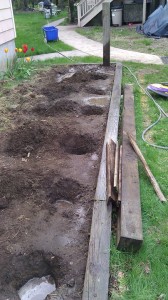 Here we had tilled the soil the week before. Each hole that was dug for each grape plant was 2 feet deep and contained a half cup of slow release fertilizer. Each hole was filled with water and allowed to drain prior to setting the grapevines in. The posts are 8 feet long 6×6 set 3 feet into the ground. Spacing of each vine was 6 feet apart as I wanted to train each vine to 4-5 feet both left and right on opposite wires. I choose a single wire training system that ran a 9 gauge wires on each side of the posts with the intent on a Geneva Double Curtain fixture on the top eventually.
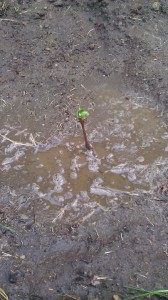
Each grapevine was grown from a dormant cutting. The dormant cutting was purchased on eBay and was rooted for 2 months prior to being planted. Each vine was about 8 inches long with 3 inches on roots on the bottom. The variety chosen was Marquette. A cold hardy red grape similar to merlot and pinot noir in body and taste but had been bred to specifically handle winter freezes quite well. A vigorous grower that needs pruning to shape and train the vine as it grows. Here we see a single bud pushing out a week after planting and watering.
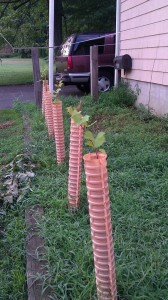
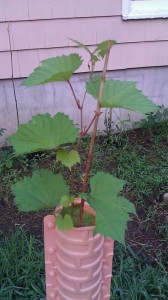
New grapevines need protection from weather and deer so a grow tube is seen in use here. These a a few dollars each and snap together around the vines. Well worth the paltry investment as they create a mini green house that makes the vines grow much faster the first year. I let one vine grow without a grow tube as a test and it remained small through the first year so I am convinced the grow tunes do their part. Each grow tube is set with a bamboo stake to keep it vertical. This picture is 3 months after the vines have been planted and you can see the vines peeking out of the top of the grow tubes. During this time the only maintenance that was done was to pick weeds away from the base of the vine and water them deeply once a week. It is good to let the soil dry out because that forces the roots to search deeply for water. If early on you water daily your root systems will be shallow and not be encouraged to root deeply.
Once the vines are a foot above the top of the grow tubes the fun of training starts. One typically has the wires on trellis set but since I had already set my posts at onset I waited until the vines proved to be viable. I set a 9 gauge wire 3 feet high on each side of the trellis. I removed the leaves from the vine from the base to 3 feet up so growth would be concentrated towards the top of the vine. One side of the vine I loosely tied to the wire and I selected a shoot from the other side and tied that one also so now we have a shoot in opposite directions. All leave below this juncture, valley, or “Y” have been removed.
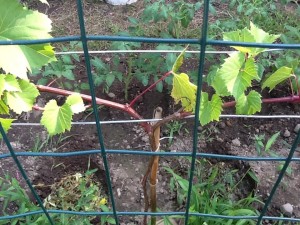
Here we see the Y is very visible and not that all growth below the Y has been removed. This forces the vine to thicken and grow outward. In this first year the vine is allowed to grow as it wished with little intervention from the grape grower other than loosely tying the vine to the training wire. I removed the grow tube as there is no longer any greenhouse benefit but I did add a fence to keep the local deer at bay. They like to chew on the grape leaves. The ends of each arm or cordon is allowed to grow to 3-4 feet on each side of the main central trunk. The ends of the vine have what is call the apical tip or growing tip and that is where the leaves and vine grows outward from. When the desired length has been reached one snips off the growing tip on each side of the cordon. This will make the grape vine thicker, no longer grow outward on the cordon but will force the buds along the cordon to begin growing. The buds along the cordons are called spurs or shoots.
At 7 months since planting we see the grape vines growing well and filling the training wires. At the end of season one we do not get any fruit but we train the grapevine to the shape we want. At fall time the leaves fall off the grapevines and they pull all the nutrients they need from the leaves and go dormant. No maintenance or protection needs to be offered from the grape grower. Keep in mind that while the vine enters dormancy any watering schedule in effect should be terminated.
The following spring we see the cordons clearly defined here. From the Y place ones hand on the cordon and remove any vertical shoot that is within a hands width. This should leave you with 8-10 spurs or vertical growth points on each cordon. Each spurs should be allowed 2-3 buds remaining. Remove any buds or leaves that are NOT growing on the spurs. Think of the main trunk and cordons (arms) as water passages only. Its the spurs that have the buds which are allowed to keep their leaves and are allowed to grow. The leader off the spurs can ben heavy when fully leafed out so make sure your wire is tight or it will buckle due tot he weight of the vine.
Happy grapevine growing!
